Ms. Hsieh 's Clarke Art Room- 8th Grade
Thursday, September 26, 2024
Wednesday, September 25, 2024
Tuesday, September 24, 2024
Tuesday, September 17, 2024
Phone Stand - 2
Phone Stand - 2
How to make a combined pinch pot
You Must :
Bring one and or donate a box of" Zipper Gallen Storage Bag" by Next Art Class.
Canvas and water spread bottles
Clay Cart and Clay Sitting Board
Greenware
Clay Cart and Clay Sitting Board
Tools on the demonstration table
Student's tools
Craft Sticks
Modeling Tools
Pin Tools
Carving tools
Google Doc.- Sketch Example
How to design a n useful phone stand?
Rubric:
1. Functionality First:
- Phone Fit: Ensure the phone stand is designed to fit the size of a smartphone. The stand should have a secure groove or cradle where the phone can rest.
- Tilt and Viewing Angle: The phone should be tilted at a comfortable viewing angle, usually around 60-70 degrees, for easy viewing while sitting or standing.
- Accessibility: Make sure that buttons, ports, and speakers aren’t obstructed. You could carve spaces for charging cables to pass through.
2. Structural Stability:
- Balanced Base: The base should be wide and sturdy enough to support the phone without tipping over. A low center of gravity helps keep the phone stable.
- Weight Distribution: Use a combined pinch pot that spreads the weight evenly. The back support should be strong enough to hold the phone upright.
3. Use of Techniques:
- Score and Slip: Use the score and slip technique to securely attach parts. For example, if you're adding decorations like ears, tails, or compartments, make sure they’re attached properly so they don’t fall off.
- Additive Techniques: Add functional or decorative features, such as trays for small items (keys, pens), hooks for charging cables, or holders for other accessories.
- Subtractive Techniques: Carve out designs, textures, or details like patterns, logos, or symbols to make the stand visually interesting.
4. Creative Design Ideas:
- Geometric Shapes: A simple geometric shape (e.g., pyramid, cube, or cylinder) can make a minimalistic and modern phone stand.
- Organic Shapes: Consider animal or nature-inspired designs. For example:
- A cat lying down, with the phone resting on its back.
- A bird or sea creature holding the phone with its wings or tentacles.
5. Aesthetic and Personalization
- Smooth Finish: Make sure the surfaces are smooth without jagged edges, bumps, or dents. This enhances both the look and feel of the stand.
- Underglaze and Glaze: Apply three coats of underglaze for color and three coats of clear glaze for shine and waterproofing. Make sure to apply evenly for a polished look.
- Personal Touches: Add a positive word or symbol that reflects your personality or the intended use of the stand (e.g., "Relax" for a bedside stand or "Inspire" for a desk stand).
6. Incorporate Extra Functionality (Optional) :
- Multi-purpose Use: Add a small compartment for storing accessories (like earbuds, coins, or pens). You could also integrate hooks for hanging charging cables or small items.
8. Sketch and Plan Before Sculpting:
- Draw sketches of the phone stand from different angles (front, top, and side views) to visualize the final design. This helps ensure balance, aesthetics, and function.
- Include notes about the dimensions and techniques you’ll use.
Wedging clay
Steps of a single pinch pot
1. Form a ball of clay
2. Open
3. Pinch in to make the bottom
4. Pinch and Rotate.
Pinch
Pinch more
Until done
Double Pinch Pot Joining Technique
1. Score around the rims of each pinch pot with a pin tool. You can crisscross the score marks .
2. Apply slip
Slip: A mixture of clay and water used to join scored pieces of clay.
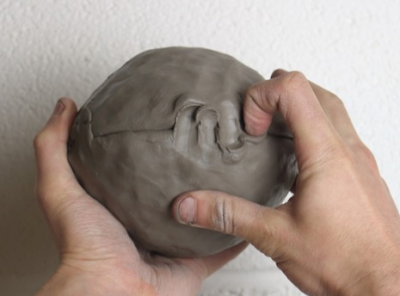
3. Place the pinch pots together. This is the most crucial part of the making process! Push one rim into the other by digging your finger in just a little and pushing over to the other side. Repeat all the way around the join. It doesn’t need to look neat!
4. Shaping
Once joined you can gently hit the pot with a stick all over to compress and reinforce the join. Get it into a round shape and knock out the join and pinch marks, patching up any holes using the above technique.
5. Shape the piece to your desired shape. Air hardening clay may not get much taller, but you can use modeling tools to create a smooth surface and define the shape by smoothing up and down.
Subscribe to:
Comments (Atom)


