
Visual Arts Standard 1:
Understanding and applying media, techniques, and processes
Visual Arts Standard 2: Using knowledge of structures and functions
Visual Arts Standard 3:Choosing and evaluating a range of subject matter, symbols, and ideas
Visual Arts Standard 4:
Understanding the visual arts in relation to history and cultures
Visual Arts Standard 5:
Reflecting upon and assessing the characteristics and merits of their work and the work of others
Visual Arts Standard 6:
Making connections between visual arts and other disciplines
Rubrics:
- Apply Foreground, Middleground, Background for a composition: Each point of interest or focus had to either be positioned on a different side from another panel or be higher on the page than the one before it.
- Perspective: When creating paths, or roads, perspective had to be utilized for the layers to match.
- Space and Proportion: Subjects in the foreground are to be larger than subjects in the background or on the back cover.
- Measuring and Using Artistic Tools: During this lesson, we used rulers, scissors, glue, folding tools, and with an X-Acto knife.
Assessment:
- What is a tunnel book?


- How long have tunnel books been around?
- What inspired tunnel books?
The name “tunnel book "probably came from the fact that many of these types of books were created to celebrate the building of the tunnel under the Thames River in London in the mid-19th century. Throughout history, tunnel books have often been used to commemorate certain events. They've also often been sold as souvenirs at tourist attractions.
What kinds of stories would lend themselves well to a tunnel book? Give it some thought and then brainstorm some ideas for tunnel book stories.
Ideas:
Literacy:
Science
- Body System
- Solar Systems
- Molecular Structures
- Ancient Civilizations
- Maps
- Historical Biographies
Problem Solving
Thinking Backwards is key to this lesson. We began with a complete sketched picture. What do you want the entire piece to look like when the viewer is looking straight ahead?
Examples:


Tunnel Books: Step-by-Step
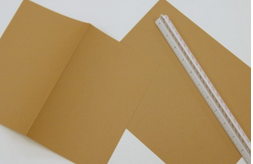
Step 1: Gather your supplies. To make a simple three-paged tunnel book, you will need three pieces of paper for the image, two pieces of paper for the spine, a pencil, a ruler, an X-Acto knife and/or a pair of scissors.

Step 2: This was the hardest step, deciding on a drawing or picture with either defined perspective or many objects clearly defined.
BE SURE TO INCLUDE:
1. Objects/background on the sides of each pane that will hide the accordion sides. This means 1” frame minimum on each layer.
2. Plan your scene so that objects that are closer to the viewer are larger- far away objects are small.
1. Objects/background on the sides of each pane that will hide the accordion sides. This means 1” frame minimum on each layer.
2. Plan your scene so that objects that are closer to the viewer are larger- far away objects are small.
Making the First Pane:
1. Where you start is up to you, however, it is highly recommended starting with the front pane.
2. If you would like to build from the back panel to the front, you can, but objects along the sides of the back WILL be covered by top layers. Keep important objects in the back pane in the middle.
3. If you start at the front, begin by sketching a 1” border and drawing the ‘up close’ objects large.

Step 3: After you have the drawing on each page, cut them out.

Step 5: Cut the folded sheet in half, making two smaller strips of paper. Repeat step 4 and 5 with the second sheet of paper. You now have four strips of paper.
Step 6: Take each of these four strips and make four M-shaped accordions. To make an M-shaped accordion, fold the strips in half lengthwise; then fold the edges back to the centerfold.

Step 7: Now we are ready to assemble the tunnel book.

Step 8: Place the back page on top of two of the M-shaped accordions, one on each side. Make sure that the creases are on the outsides, and glue the page to the back of the accordion (see photo for Step 9).

Step 9: Glue the next page to the top of the first M-shaped accordion. Next, attach the second M-shaped accordion pieces, one on each side. (You’re sandwiching the middle page between the two M-shaped accordion folded pieces on each side.)

Step 10: Glue the front page of your book to the top of the M-shaped accordion strips at either side and let the glue dry.

Step 11: You have just made a tunnel book!

Art Example by Ms. Grant.
Background


Discussion-1
The class will be divided by the teacher into many groups. 4 or 5 people in a group will share the same conduct grade (50%)
• Everyone in your group needs to finish his/her project on time
• A final group presentation for the project
• An individual written statement to express the main idea and to be posted in the online gallery.
Who are the people on your team? Please write down the names.
1,
2,
3,
4,
5,
One team leader will facilitate the group discussion. Name:_______________________________
• What is the main idea of your Tunnel Book
• Summarize the ideas –record the discussion (one person) Name:_________________
• Present the ideas (one person) Name:____________________________
Jobs to be shared during the project:
• Monitor the progress – According to the project assessment, you help each other to finish the project on time. In what method your group has to make sure everyone is well supported?
Answer:
• What is the visual material to support your presentation? PPT? Goode slide? Who is the anchorperson to monitor the final product for the presentation?
Name:_________________________
• Final group presentation –(one person) Name:____________________
• Clean up—who is the anchorperson to monitor this job for your group?
Name:___________________________
The story of Vincent Van Gogh
The Big Idea: Treat others how you like to be treated.
Camille and the Sunflowers
Roulin's family


Portrait of Camille Roulin


The starry night( Background)

Fishing boats on the beach at Saintes Maries
( Middle ground)

The street, the yellow house
(Foreground)

How to improve your drawings to show 3 D effects on the 2D surface?
1, Depth- Overlapping objects
2, Perspective- Size, vanishing point
3, Color- adding value, Analogous colors
4, Contrast –Adding texture, value(highlight and shadow)
1. How did making your tunnel book help you and others learn a lesson?
2. What were your motivations to create the drawing?
3. How does the theme in your art relate to personal experiences you have had?
4. How did you work to convey your message?
5. How is your theme shown in your artwork?
6. How is your theme expressed in your pictures?
1. How did your idea develop?
2. How is your theme shown in your artwork?
3. How can color be used to convey emotions?
4. What mood do you want to present and what art techniques will you use to show that mood?
5. If you could do it over, what would you fix?
Layout : # of slides of each person
Introduction:
Individual work:
Big idea based to the theme:A short statement
Artwork : foreground, middle ground, background
Reference: Pictures you used
Art critique: Elements of Art; Principles of Design
What have you learned?
What would you improve?
Conclusion
Team spirit:
How did you work as a group?
How do you want others to learn from your presentation?
Big questions for the big idea
1. How did making your tunnel book help you and others learn a lesson?
2. What were your motivations to create the drawing?
3. How does the theme in your art relate to personal experiences you have had?
4. How did you work to convey your message?
5. How is your theme shown in your artwork?
6. How is your theme expressed in your pictures?
Critique your own Artwork
2. How is your theme shown in your artwork?
3. How can color be used to convey emotions?
4. What mood do you want to present and what art techniques will you use to show that mood?
5. If you could do it over, what would you fix?
Final Presentation:The Slides
1. Showing the Unity- One presentation-Layout : # of slides of each person
Introduction:
- Team Name
- Names of group members
- Theme- explanation(educational and school appropriate)
Individual work:
Big idea based to the theme:A short statement
- Your research that motivated you.
- Books that inspired you
- The personal experiences you would like to share
- Movie
Artwork : foreground, middle ground, background
Reference: Pictures you used
Art critique: Elements of Art; Principles of Design
What have you learned?
What would you improve?
Conclusion
Team spirit:
How did you work as a group?
How do you want others to learn from your presentation?