What is a good phone stand?
Think of Animals - Birds, land animals, ocean animals.
1. Built from a combined pinch pot

2. Have supporting points to keep the phone sit on the stand in balance

3. Form a wide based structure to avoid tip over :
Sitting position/ belly down position/ belly up posting


- The structure is formed from thin slab
- Standing positing with tall lags
- Narrow base
- Handing the add-on additions away from the main structure
- The additions are too narrow and skinny


1. Planing
- Draw sketches to different views of the phone stand
- Write down your thoughts


Build a combined pinch pot 


2. Slip: A mixture of clay and water used to join scored pieces of clay.


Steps of joining double pinch pots
1. Form a ball of clay

2. Open

3. Pinch in to make the bottom

4. Pinch and Rotate .

Pinch

Pinch more

Until done
Double Pinch Pot Joining Technique
1. Score around the rims of each pinch pot with a knife. You can crisscross the score marks and add slurry or water to help the clay stick.

2. Slip: A mixture of clay and water used to join scored pieces of clay.
Apply slip

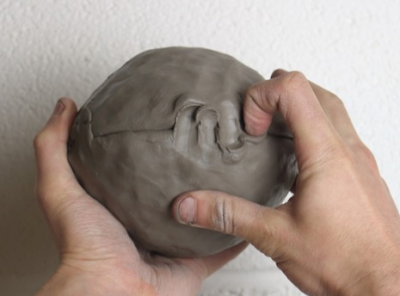
3. Place the pinch pots together. This is the most crucial part of the making process! Push one rim into the other by digging your finger in just a little and pushing over to the other side. Repeat all the way round the join. It doesn’t need to look neat!


4. Shaping
Once joined you can gently hit the pot with a stick all over to compress and reinforce the join. Get it into a round shape and knock out the join and pinch marks, patching up any holes using the above technique.


5. Shape the piece to your desired shape. Air hardening clay may not get much taller, but you can use modeling tools to create a smooth surface and define the shape by smoothing up and down.
